New central keyword search
For better navigation in the sea of data stored in CDESK, we present a new central interactive search. The key search field is in the top centre of the screen. When a user clicks into this field (without entering a string), the records last edited by the logged-in user are automatically retrieved.
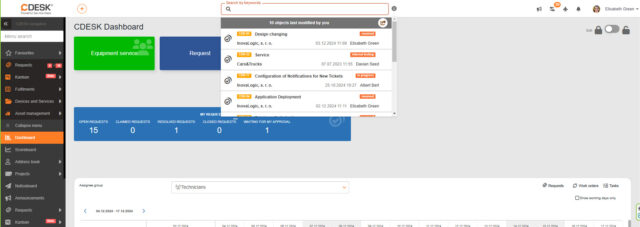
It includes new keywords referring to modules, functionalities and elements in the CDESK system. These keywords make your search more specific and get you to the desired result faster. The use of keywords narrows down the search space. As an example, we can use the abbreviation “cdr”, which in the search logic refers to the Requests module. After typing this abbreviation, you can type a part of the request name or number into the search and the search will only go between requests.
If you are interested in getting the most out of your search, read the help next to the search box under the “i” symbol.

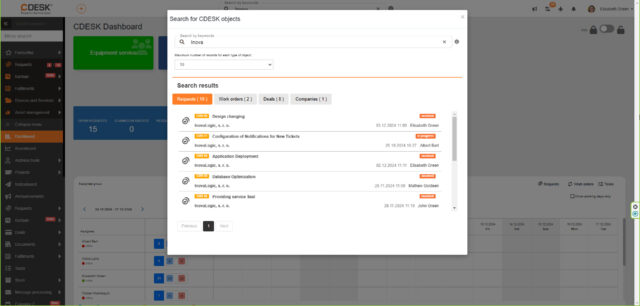
Search results are displayed in a larger modal window when you press Enter on the keyboard. The results from the search are displayed structured by tabs according to the individual CDESK objects. For example, typing the company name and pressing Enter will bring up a window that displays a list of search results. The company name can appear in Work Orders, Deals and of course in the Address Book. In this interface, the user will see how many matching elements are in which module and can view them.
Kanban – the first version of tile display of requests, tasks, work orders
The Japanese Kanban method of working breaks down a work task into smaller aspects that gradually move the deal, task or request through sub-tasks to the desired outcome. The essence of kanban is tiles that can be moved between columns. The columns in a kanban represent a summary of workflows, so moving a tile between columns in practice represents moving a task to the next stage. Kanban simplifies control, systematicity and sequencing. This useful concept is used by many modern companies, so we bring it to you as a tool for streamlining workflows.
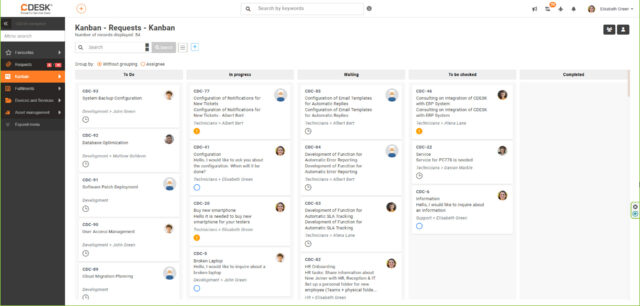
Kanban in the CDESK system, in its first version, is a stand-alone, handy module that can be linked to other task management modules, namely Requests, Work Orders and Tasks.
Activation of Kanban is done in Global Settings -> Kanban, where you need to activate the switch of the same name. This interface also offers the possibility to create new Kanban boards, which are the basis for working in Kanban. After pressing the Add button with the “plus” icon, several options are offered when creating a board. The user has to type the name of the board in the form displayed and choose from which module the cards will be displayed in the new board. In Kanban it is possible to display cards from a list of requests, work orders or tasks.
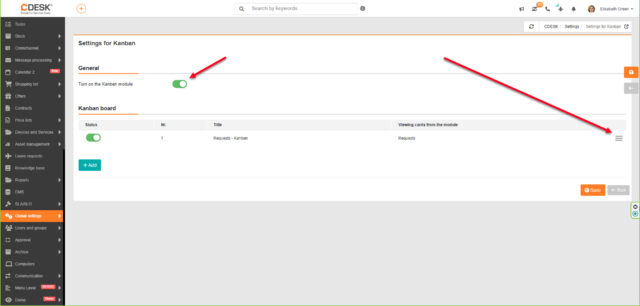
The user can filter elements from other modules based on their own preferences. For example, when creating a Kanban board linked to Requests, it is possible to include only requests related to a specific company or deal in the board.
Part of the custom settings when creating a board is also to modify the visibility, i.e. to specify the users and groups to which this board will be made available.
The basic settings are columns that represent the state of each object. Here you can choose the number of columns, their names, the states they will contain, their order. Finally, you need to specify the card template, i.e. what data each card in Kanban will contain. You can display on the card the object number, the name (of the request, task or work order) or, for example, the due date and the responsible assignee.
Kanban in CDESK 3.2.5 is presented in an initial version that allows smooth work. We have identified missing features that will improve the user experience and will be worked on in the next versions. You can expect their implementation in spring 2025.

Borrowings – new functionality for managing your equipment borrowings
Assets such as computers, telephones or vehicles can be borrowed to employees for a certain period of time. This process is covered in CDESK by the Borrowings module, which is an efficient tool for tracking the movement of company assets.
Borrowings are entirely in your hands. You determine which devices employees can request, whether the borrowing is subject to your approval, and who will be notified of the borrowing. In fact, for each borrowing, you can set up notifications to be sent at a time and wording of your choice, keeping interested employees in the loop. And the approval process settings will prevent arbitrary or unauthorized handling of company assets.
Any type of device from the Configuration Database (CMDB) can be the subject of a borrowing, you just need to make it available for it in the settings. The detailed procedure for making devices available for loan is given in the manual on our website.
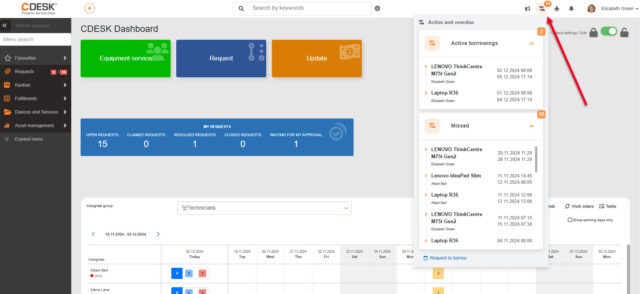
Applying for a borrowing is not a lengthy process. You can request a borrowing either through the Configuration Database or through the Calendar module. In the Configuration Database, you can easily search for an item using a filter or text search. In the Calendar, you can add items to your favourites that are available for borrowing. After marking an item from the list, simply click on the day on which you want the borrowing to begin. At the same time, the system will always notify you of ongoing or planned borrowing of a particular piece of equipment.

Thanks to the connection with the Calendar module, it is also possible to keep track of ongoing borrowing dates in a clear interface.
One way to request a device borrowing is to look it up in the configuration database. If the device is available for borrowing in Global Settings, a “borrowing” button will appear here, as illustrated in figure below (box no. 1). In box no. 2, the user can view a list of pending and scheduled borrowings for that device. Switch no. 3 is used for manual/local access to the device for borrowing but is only available to the environment administrator. Switch no. 4 will allow the approval process to be created once a request has been made.

Setting up receiving and sending emails via MS GraphAPI, IMAP, SMTP via webGUI
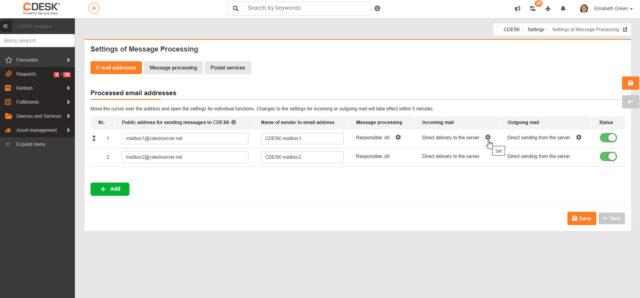
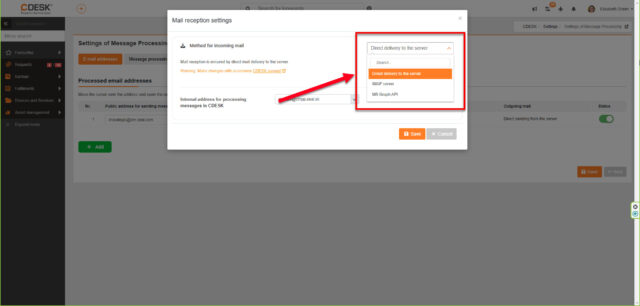
To make it easier to set up receiving and sending emails in CDESK, we have added a web interface with multiple methods for processing messages. With version 3.2.5, you can now set up receiving emails via the web also via IMAP and Microsoft GraphAPI protocols (Microsoft365 mailboxes). In the web interface you can also set up sending e-mails via your defined SMTP server or via Microsoft GraphAPI. The current methods of receiving e-mails to the internal address of the CDESK server and sending them via the CDESK server remain unchanged.

Setting up this protocol in your account is a complex process that requires an expert with knowledge of mail protocols.
Flexibility has increased, as you can receive and send each mail address processed in CDESK using different methods. You can receive messages for a mail address via IMAP and send them via your SMTP server. You can receive and send to a second address using MS GraphAPI, and in a third address you can process messages through the CDESK server.
Setting up the methods for receiving and sending messages is done in Global Settings -> Messages for Processing. Point the cursor to the mail address and the gear icon for the setting will appear.
Note: If you have already set up your CDESK to receive mail via IMAP/send via your SMTP server and want to switch to the new web environment, you need to contact CDESK support as you need to disable the existing IMAP/SMTP settings.
Process automation through external scripts
CDESK allows you to exchange data with other applications via APIs, control CDESK from other applications or automate activities. The goal is to relieve workers from tedious and redundant administrative tasks, and to make business processes more dynamic.
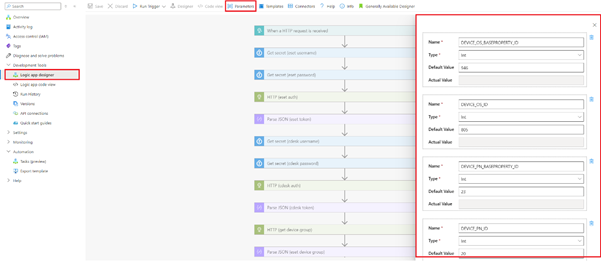
To make it easier to deploy these features, we’ve prepared examples for you to create your own solutions. The examples are:
- Custom processing of e-mails received by CDESK, creation of requests from e-mails according to custom criteria
- Loading the list of computers from ESET Protect console and creating it in CDESK Configuration Database, updating the number of computers in billing items to automate invoicing.
The examples are processed in Python programming language in two environments: in Docker containers and in Azure environment. The advantage of Dockerized Python scripts is running in an isolated environment and relatively easy portability between servers. The disadvantage is that you have to provision hardware resources, network settings, and configure the Docker environment. However, Docker is a widely used and well-documented platform, which means you can easily find an expert to help you with deployment.
We recommend Microsoft Azure as a second environment for running scripts. The advantage is that there is no need to secure any hardware and system resources and the price for the service is very low. The disadvantage may be the initial difficulty of setting up the Microsoft Azure service, which, however, with the help of the manual can be managed.
For more information on the scripts and how to deploy them, see these manuals.
Requests
Text translations in the text editor and in discussions (via MS Azure)
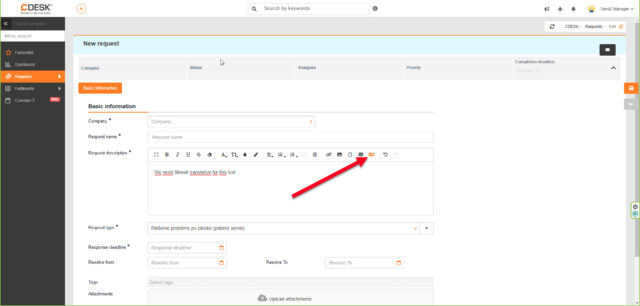
Don’t worry about the translation. In discussions and text editors across the CDESK system, you can now have your written text translated by AI. Once you’ve written your text, press the translation button that is part of the bar of every text editor. In this version, we have selected the following languages for you: Arabic, Chinese, Czech, English, Czech, French, German, Hungarian, Italian, Hindi, Japanese, Korean, Polish, Portuguese, Russian, Slovak, Italian, Spanish, Ukrainian. In the next version 3.2.7, we will also make other world languages available to you.
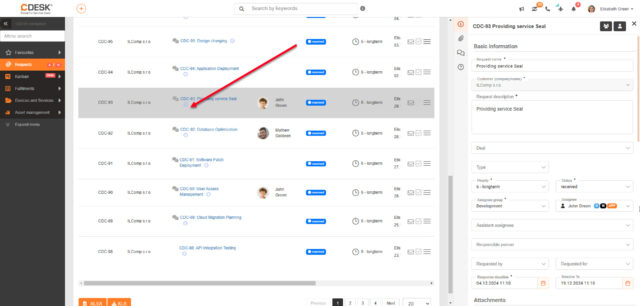
The first version of the right panel with the request detail in the list of requests
In version 3.2.5, the simple request preview in the list of requests has been replaced with a right panel where you can not only view the request, but also edit it. Currently, the first version of this panel with limited functionality has been deployed. For now, you can change the request name and description, selected statuses, priority, assignee, deadlines and so on.
Soon, we will add discussion posts, request acceptance, fulfilments, test results, approvals, custom fields and other frequently used features to the right panel.
The goal is to provide users with a faster way to edit basic request data in a simple and intuitive interface.
Selection of CI items by condition in regular requests
When you create a rule for a regular request, you can add items from the configuration database (CMDB), which are also inserted into the request created by this rule. In addition to manually adding items from the database, users can also add items based on dynamic criteria using the advanced filter. When creating a regular request, simply navigate to the CI Items tab. After activating the toggle switch, the filter will become available, where you just need to enter the condition that the searched items should meet (place, status, company. etc) and select from a list of these data. If there are items in the system that meet the criteria, they will be displayed in the list. To assign all items in the list, press the “Save” button.
Note: To successfully insert selected CI items, you must have their main type and item type (CI Type) enabled for insertion into the requests. Find the setting in Global Settings -> Requests -> Basic Settings under CMDB Items.

Locked export of requests to XLSX for customer (other) accounts that have limited column selection
If you want your customers to have a uniform environment, CDESK offers you the possibility to lock columns that might contain sensitive or unwanted data. When columns are locked, the columns in the exported file will also be restricted.
This feature was also available for requests in previous versions, but the administrator did not have the option to lock columns when exporting the list of requests.
The administrator can lock the ability for customer accounts to add or remove columns in the list of requests. This way, customers only have the columns you have defined by default to work with in the list of requests. The pre-selection of columns for both customer and assignee accounts is done in Global Settings -> Requests, where there are 2 buttons in the default settings of the list of requests. One modifies the list of columns for assignee accounts and operators, the other for customer (other) accounts. When either button is pressed, the current column settings for that user type will appear, with a gear symbol on the right side of the list. After pressing it, the basic interface appears, in which you can assign columns from available to active (from right to left).

Modification of the logic of sending attachments in notifications under discussion (notif. under requests)
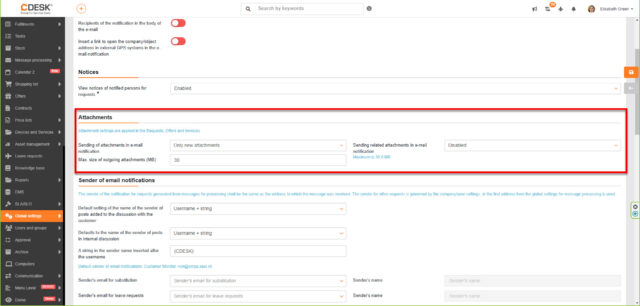
Under discussions, we have modified the options for sending attachments in mail notifications to ensure protection of sensitive data. In certain environments, it is undesirable for attachments to be part of mail notifications. To set up sending attachments, go to Global Settings -> Notifications -> Basic Settings. Under Attachments, there are 3 options:
- Sending attachments in email notification
- Sending related attachments in email notification
- size of attachments to be sent
The field called Sending Attachments in Email Notification is a setting for attachments sent in the discussion under the request or inserted directly into the request. Here the user has 3 options to choose from:
- New attachments only (User receives only new attachments)
- All attachments (the user receives with the new attachment all previous attachments that are in the request).
- Disabled
The CDESK is also familiar with the concept of “related attachments”. These are attachments that are not the subject of discussion or request but are added to the request through offers, tasks and fulfilments that are linked to the request. Setting up the sending of related attachments takes place in Global Settings in the Attachments section. However, the field titled Sending Related Attachments in Email Notification can only contain 2 values:
- All attachments
- Disabled
In the Max. Size of Attachments to Be Sent field, you can set a limit on the size of the file sent in the notification, but in the case of related attachments, the limit is fixed at 30 MB.
New fields for the Requested By and Requested For request templates
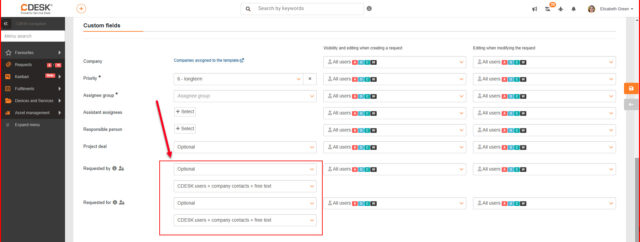
When creating or editing a request template, fields named Requested By and Requested For are now available. In previous versions of CDESK, these fields were found only in the Global Settings of the Requests module and applied universally to all requests. In the current version, when creating each request template, users can choose how both the requester and the recipient can be assigned to the request. In Requests -> Request Templates, the following fields are displayed in the Custom Fields section when creating/modifying a template. Both fields can be marked:
- mandatory,
- optional
If the Requested By field is disabled, the Requested For field is automatically disabled as well, as they are related data. If (any) field is not marked as mandatory, this field does not need to be filled in the request and the request can be created without it. If a field is marked as mandatory, the requester/recipient must be selected.
The requester and recipient can be selected based on three conditions that are set in this template interface:
- CDESK users only
- CDESK users + company contacts + free text
- Only subordinate users of the CDESK
These settings affect whether the Requested By and Requested For fields are displayed and editable in the created request from the template.
Fix automatic suggestion of recipients for request discussion
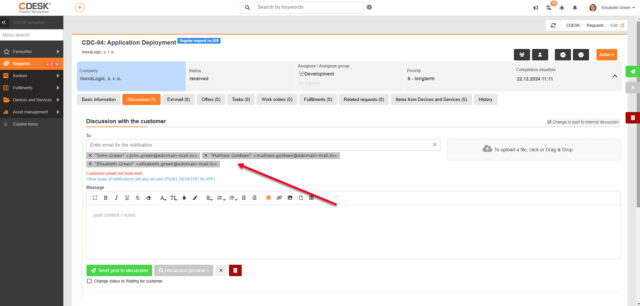
In previous versions of CDESK there was an error in the suggestion of recipients for the discussion with the customer as well as for the internal discussion. Recipient addresses were being lost and the reason was conflicts with new components deployed in the CDESK system. We have now rewritten most of the code and the design of the recipients has improved significantly. There is still a small part of the code to replace, so it is advisable to keep checking the recipients.
Extending the connection of two CDESK environments – CDESK connector
New term options
We have expanded the possibilities of linking two or more companies that use CDESK to transfer information to each other. When creating an external request to a connected CDESK environment, a deadline option is available. The setting is done in Global Settings -> Connectors, API -> CDESK 3.x connector -> New Request tab. With this feature it is possible to select the completion deadline, response deadline or time to alternative solution when creating an external request. If the request in the attached CDESK contains a deadline for a time to alternative solution, this deadline will also be displayed in the originator’s CDESK in the request details.
If the switch is disabled, the deadlines are selected according to the settings of the connected (target) CDESK environment.

View deleted requests
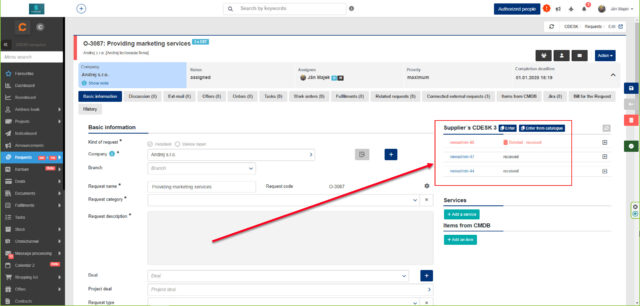
If the request is deleted on the side of the connected CDESK, the user in the source environment (where the request was created) will be notified. On the right-hand side of the request from which the request for the attached CDESK was created, the deletion information will be displayed in red font as shown in the figure below.
Creating requests from the catalogue
Linked CDESK environments in version 3.2.5 can allow you to create requests via the catalogue of requests from the linked CDESK environment. The function creates a linked (external) request according to a template in the linked CDESK environment. In an open request in your CDESK environment, the option Select from Catalogue appears in the right pane of the first tab or the Linked External Requests tab. When pressed, you select from the request templates of the connected CDESK environment.
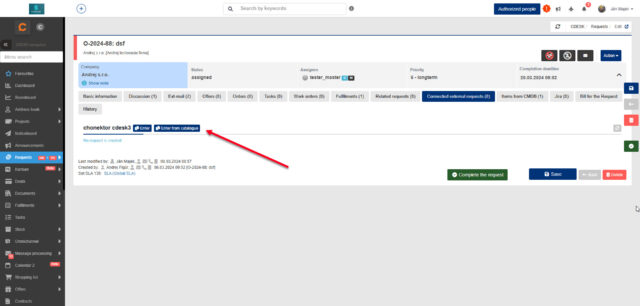
In the source CDESK display the history of acceptances, test results of the request from the linked CDESK
The history of accepting/rejecting a linked request has so far only been seen by the user logged into the linked CDESK. Since the current version of CDESK 3.2.5, the history of previous statuses, including the current status, is displayed on the right side of the external request. When changing to certain statuses, this step needs to be approved in both environments. This is a completed, customer-side testing.

Fulfilments
Option to preset the link when entering a new fulfilment
For newly created fulfilments, you have the option to choose a default fulfilment link, i.e. to choose which element the fulfilment will be automatically linked to. This can be a company, a deal, a request, a work order, a project deal or a task. The default fulfilment link is set in My Profile (by clicking on the avatar icon in the top right corner of the screen). In the Default Settings section, find the custom field called Default Fulfilment Link, where you can enter any of the aforementioned items or select the “no designation” option. After this setting, when creating a fulfilment, a list of selected elements (such as deals or requests) to which the fulfilment can be linked will automatically appear.
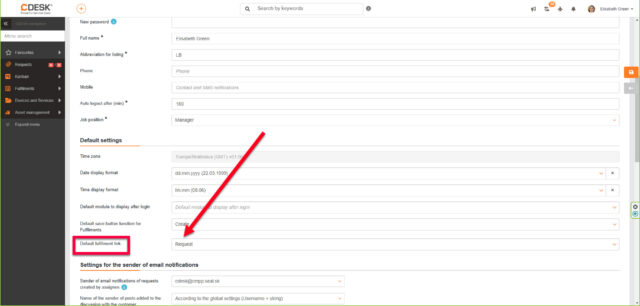
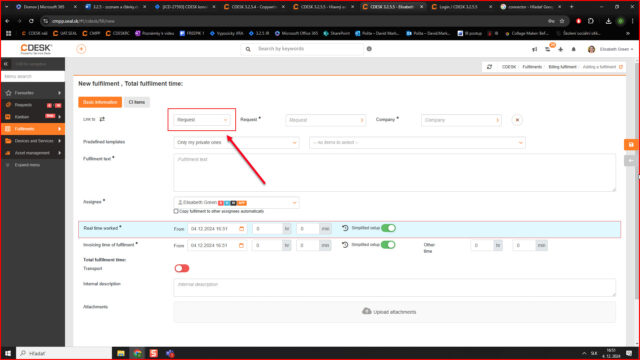
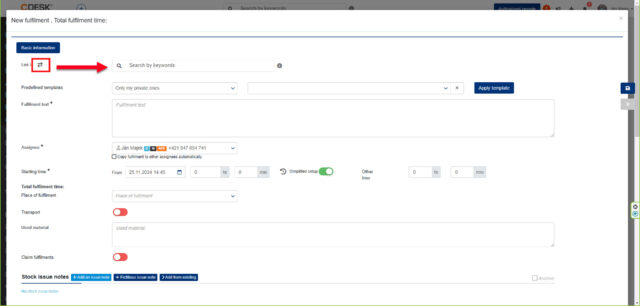
Selecting a fulfilment link by free search
Adding fulfilments is easier again. Instead of searching from a list of deals or requests, it is now possible to specify the link of a fulfilment to other CDESK objects (requests, deals, tasks, etc) by keyword search.
At the same time, the search box offers you a choice of the last elements to which you have added fulfilments. This allows the user to link a fulfilment based on one or two words in the search box, or by clicking on the suggested element. This search works on the same principle as the central search in CDESK. When creating a fulfilment, press the arrow icon next to the Link label, which changes the way the interface is searched. Note: Links using this search replaces the preset links from My Profile.
Option to predefine the list of columns for assignees and other accounts, including column locking and direct export to XLSX
With the new version, you can customize the Fulfilment UI in both customer and assignee accounts. In the Global Settings section under Fulfilments -> Default Fulfilment List Settings, you will find a toggle called Allow Users to Rearrange Columns. This is disabled, which means that customer (other) accounts cannot edit the columns in the list of fulfilments and only work with the default columns. At the same time, they export to XLSX/XLS with these columns unalterable. You can preset the columns right next to the switch mentioned above, by pressing the button called List Setup for Other Accounts. The columns you activate will be displayed to customers in the list of fulfilments once saved. The same process can be applied to the assignee accounts, with the List Setup for Operators and Assignees button located above.
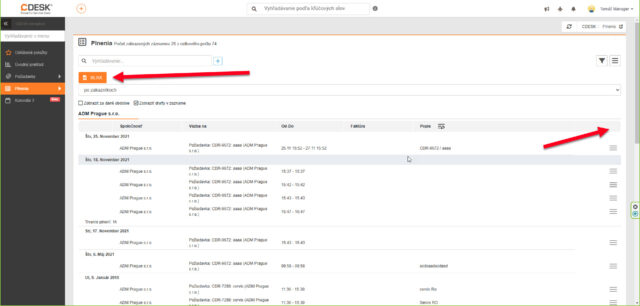
Creating an internal fulfilment when setting up a billing fulfilment
When a billing fulfilment is created and saved, an internal fulfilment can also be created for the time actually worked. This internal fulfilment is automatically linked to the billing fulfilment. The data will be identical in both fulfilments except for one difference. In the billing fulfilment, the value from the Invoicing Time of Fulfilment field is entered, while in the internal fulfilment, the value from the Real Time Worked field is entered.
To make this functionality available, you need to activate the switch in Global Settings -> Fulfilments. The switch is named Internal Fulfilments and is part of a longer list of switches. After activating it, the Real Time Worked field will also be displayed. Here you can choose one of three values: mandatory, optional and disabled.
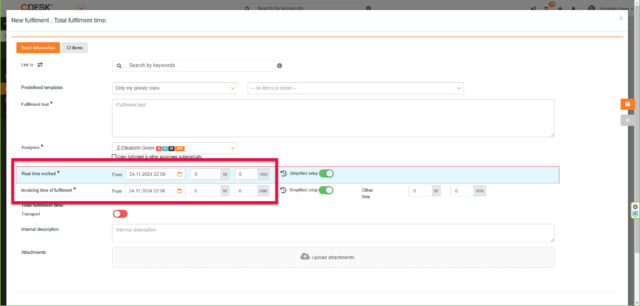
Ability to filter/export internal fulfilments (un)linked to billing fulfilments
A new column Link to Billing Fulfilments is added to the list of fulfilments, which displays the number of the billing fulfilment. It is also possible to filter and search for fulfilments according to this information. The column Link to Billing Fulfilment can also be included in the fulfilment export.
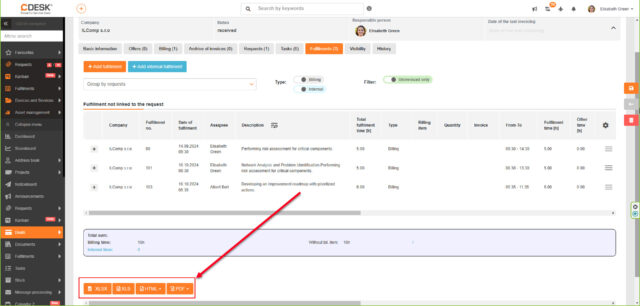
Ability to export fulfilments from an open deal
It is possible to download linked fulfilments for individual deals in all available formats. In an open deal, in the Fulfilments tab, if there is at least one fulfilment, buttons are available for export in different formats: HTML, PDF, XLS or XLSX. Before exporting, the user has the common option to add or remove columns that will be part of the exported file.
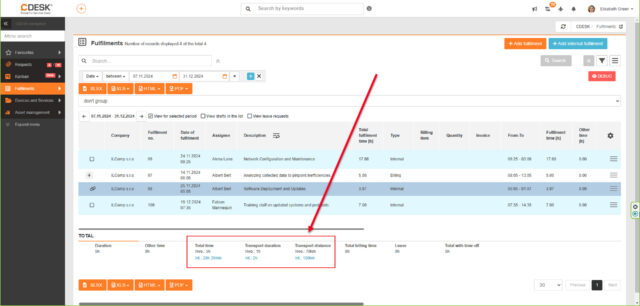
In the list of fulfilments, the sum of traffic from internal fulfilments will be shown
The fulfilment list shows the total time of the fulfilments as well as the time spent on transport in the bottom bar. The overview bar in version 3.2.5 also shows the duration of the internal fulfilment transport as well as the distance travelled. All data related to internal fulfilments are highlighted in blue.
Deals
Option to invoice flat rates early
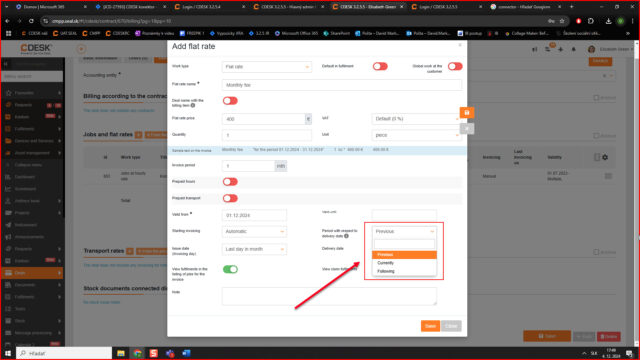
Until now, flat-rate deals could only be invoiced with a date of taxable transaction on a certain date and the date of issue had to be d+1. This was complicated by the fact that the flat rate was only credited for the previous month against the date of issue of the invoice. For the flat rate to be credited for the entire month, the invoices had to have the date of taxable transaction on the last day of the month and the invoice date had to be on the first day of the following month. Thanks to a billing modification in Deals, companies can invoice flat rates with significantly more flexibility in the taxable transaction and invoice date. An invoice can be issued mid-month with the same taxable transaction and invoice date and the flat rate will be credited for the whole month. The flexibility to offset the flat rate has been extended to the current, previous and subsequent periods, depending on the date of the taxable transaction. When manually invoicing the flat rate, there is also an option to choose whether the business wants to invoice not only for the previous period but also for the current period.
Address Book
Added search in list of companies by custom fields
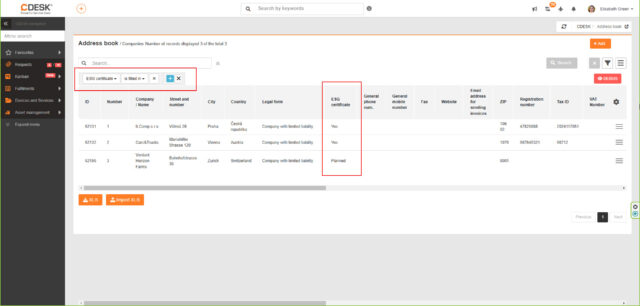
In the Address Book -> Companies module, with version 3.2.5 you have the option to search for companies by custom fields/columns. Custom fields in companies have already been implemented. They could be displayed in the company list as columns, but the ability to search by them was missing.
Asset Management
Generation of handover protocols to PDF
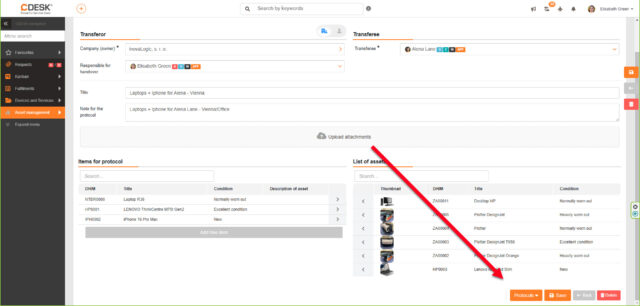
In version 3.2.5, the functionality of generating handover protocols to a printable form and PDF file has been added. After filling in the data in the handover protocol in the Asset Management, it can be downloaded to the device in PDF format.
Handover protocols are generated by the Netgrif solution. The setting for their operation is activated automatically after enabling the Asset Management module. The connector can be found in Global Settings -> Connectors, API. For environments where Asset Management has not yet been enabled, connectors are automatically created when the Asset Management module is enabled.
If Asset Management was enabled for a version earlier than 3.2.4 (inclusive), it is necessary to disable Asset Management, save the settings and enable it again. When switched on, connectors will be created to export handover protocols to PDF.
The current protocol in the Asset Management is the default report. In the Netgrif service, which is integrated with CDESK, you can create your own form of handover protocol, which can be implemented in your CDESK environment and in the Asset Management module thanks to a connector. We can also help you to set up the Netgrif protocol to your liking.


Configuration Database
Use of technical and administrative assignee by item type
The option to select a technical and/or administrative assignee for an item type has already been introduced in previous versions of the CDESK. These assignees were automatically assigned to the newly created item in the configuration database according to the settings of the respective item type.
In the new version, it is possible to preset the selection of the request assignee based on a CI item embedded in the request that has a designated administrative/technical assignee from the item type. Setting up this feature is done in three places:
– On the item type where a specific assignee is set for the administrative or technical assignee field
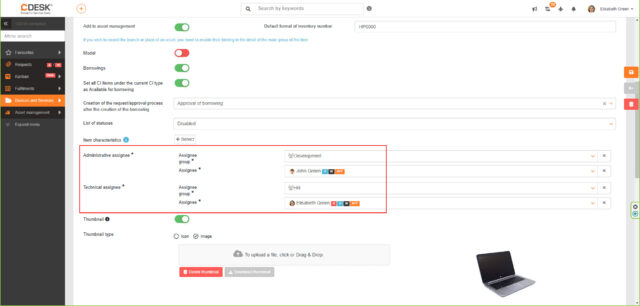
– On the CI item, where the download of the administrative or technical assignee field from the item type must be enabled
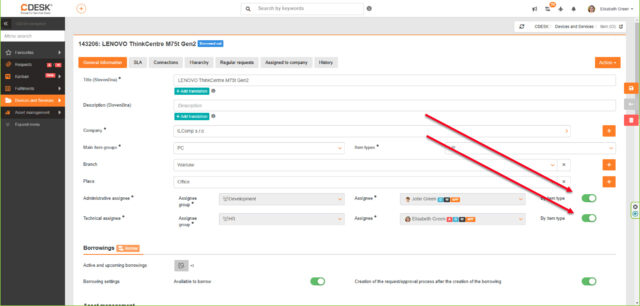
– On the request template, when setting up the assignee, the option “By administrative or technical assignee from CI…” will be selected.


Displaying custom fields in tooltip for user-defined fields of link type + modal window for displaying information about the linked item
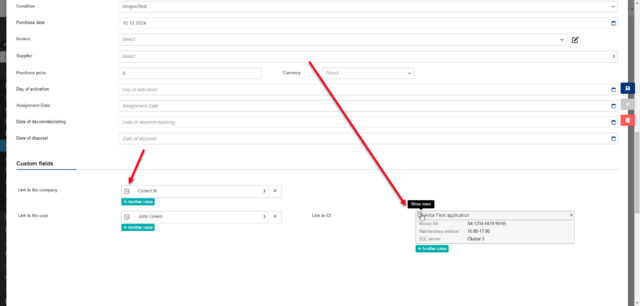
If a custom field of type “link to” is added in the CI item, a magnifying glass icon will appear next to the text when this field is filled with another object in the CDESK. When clicked, the custom fields of the specific object will be displayed in a small window. For a better understanding, here is an example. We have created a CI item in CDESK that represents a server. In this item, we insert a custom field “CI link” in which we select the Arba Flexi application object, thus creating a binding between the two objects. After entering this value, we will see an icon next to the application name that contains an overview of the custom fields of the Arba Flexi item, such as the Money S4, SQL Server, and Maintenance Window fields.
Allow selection of CI items of the category Branches and Places in requests/fulfilments/work orders
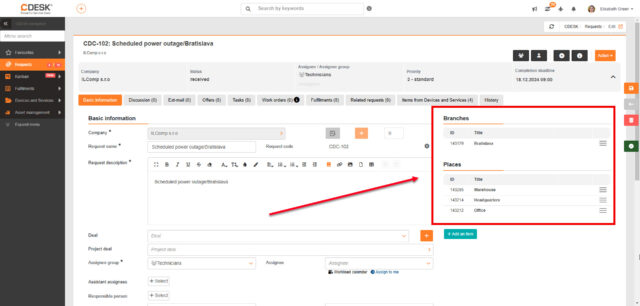
Until now, only one place could be referenced in a request, work order or fulfilment. In the request and the work order the branch/place is selected in the allowed fields, in the fulfilment it is the place of execution. If the assignment involved multiple branches and places, the basic solution was to create multiple requests/work orders for each branch/place.
You can now insert CI items from the branches/places category into requests/work orders/fulfilments. An example might be a power outage at multiple locations. You create a request and insert the affected branches/places as CI items in the request.
With this link, you can report a power outage at all affected sites with a single record.
Omnichannel VOIP
To clear the queue of outstanding calls
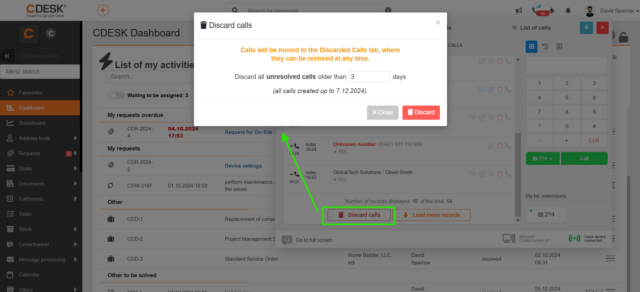
In the list of outstanding calls, the “Discard calls” button appears after ten entries. When pressed, a modal window pops up where the user sets the time period from which the calls will be moved to the trash. Calls discarded in this way are not deleted, but moved to the Discarded Calls tab where they are kept for some time (to be verified).
